RudderStack's Transformations feature enables you to write custom JavaScript functions to implement specific use-cases on your event data, such as:
- Filtering or sampling events
- Cleaning or aggregating data
- Data masking or removing sensitive PII to ensure data privacy
- Enriching events by implementing static logic or leveraging an external API
- Using an API to implement specific actions on the events
RudderStack supports the Transformations feature across your Event Streams, Cloud Extract, and Reverse ETL pipelines in both the cloud and device modes. Refer to the Device Mode Transformations and Cloud Mode Transformations documentation for more details on using transformations in each connection mode.
The below table summarizes the availability of Transformations feature across different pricing plans:
| Connection Mode | Free | Pro | Enterprise |
|---|---|---|---|
| Cloud mode | Upto 3 | ✅ | ✅ |
| Device mode | ❌ | ❌ | ✅ |
Key features
Some key features of RudderStack Transformations are listed below:
- You can apply the Transformations to your events in real-time.
- You can programmatically add and remove Transformations using the Transformations API.
- They're easier to build, manage, and debug, and reuse.
- You can create an organization-wide sandbox where your team can store the Transformations before publishing them in a production environment.
- You can version control your Transformations.
Use case
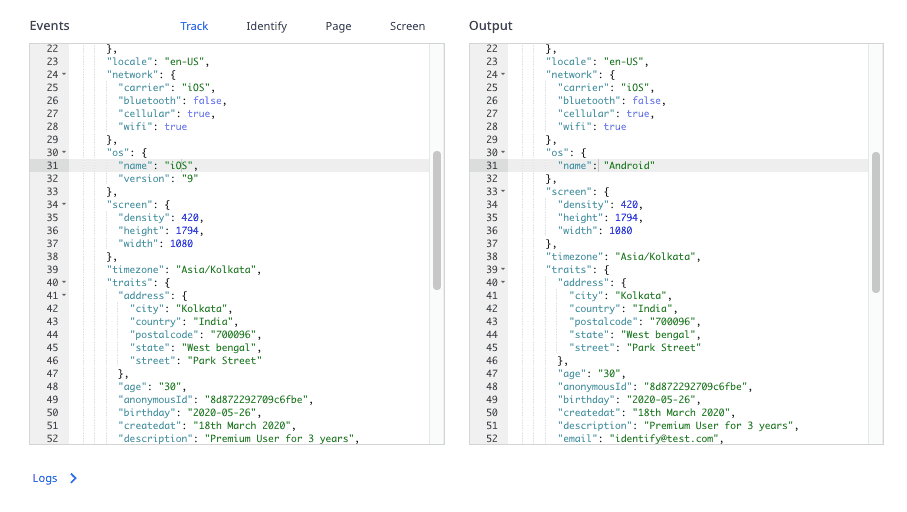
Suppose you want to set the context.os field to Android for all the events, irrespective of the actual platform RudderStack tracks the event from. You can write a simple transformation to do this:
export function transformEvent(event, metadata) { event.context.os = { name: "Android"}; return event;}The transformEvent function overrides the event's context.os.name and sets it as Android, as seen below:
Adding a transformation
To add a new transformation in the RudderStack dashboard, follow these steps:
- Log into the RudderStack dashboard.
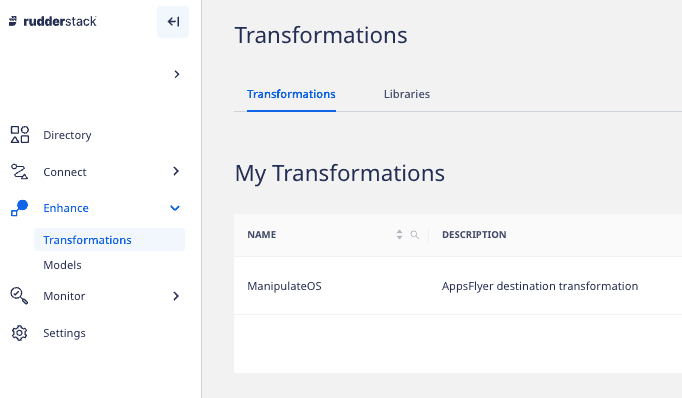
- Go to Enhance > Transformations, as shown:
- Click New Transformation.
- Add a name for your transformation and an optional description.
- Next, add your JavaScript function in the Transformation window, as shown:
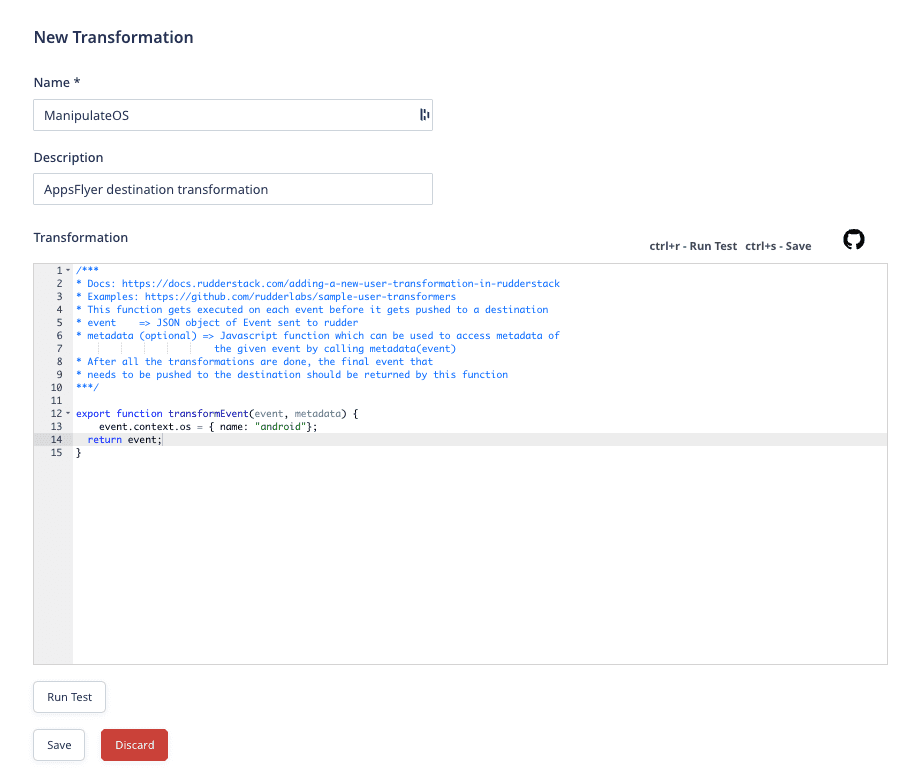
transformEvent.To test your transformation, paste your sample event in the Events block and click Run Test. By default, RudderStack provides some sample events to test if your transformation logic works as expected.

To save the transformation, click Save.
Connecting transformation to a destination
You can connect a transformation to a destination in two cases:
Case 1: While setting up a new destination
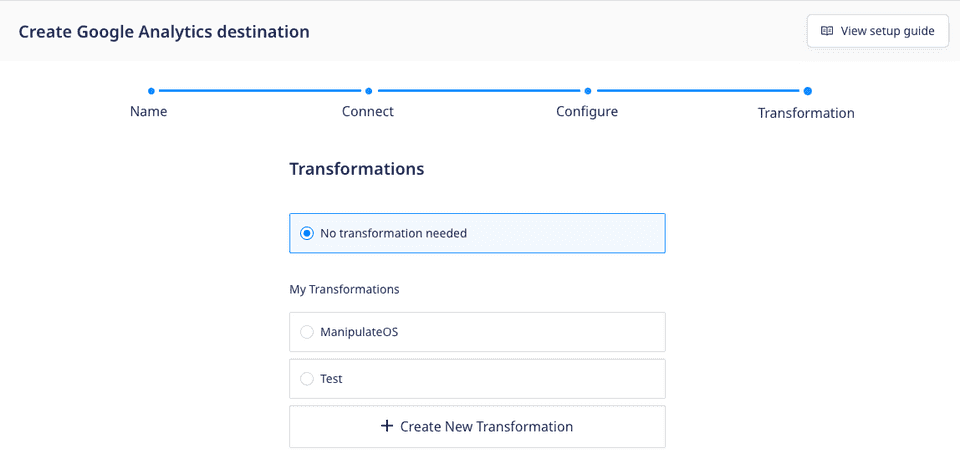
RudderStack provides the option to connect an existing transformation or create a new transformation while setting up a destination, as shown:
Case 2: While connecting to an existing destination
To add a transformation to an existing destination, follow these steps:
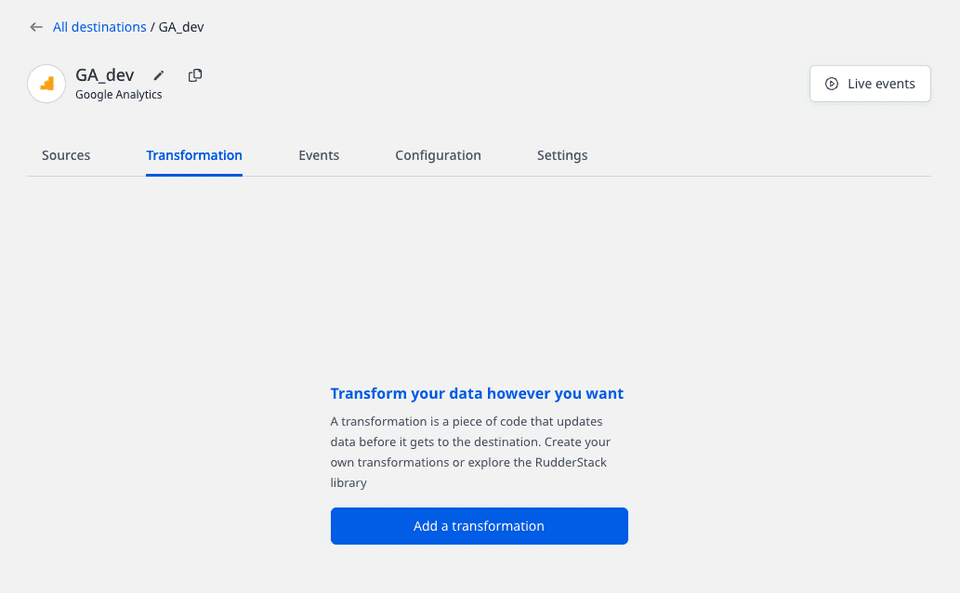
- In the dashboard, go to the Transformation tab in your destination dashboard and click Add a transformation, as shown:
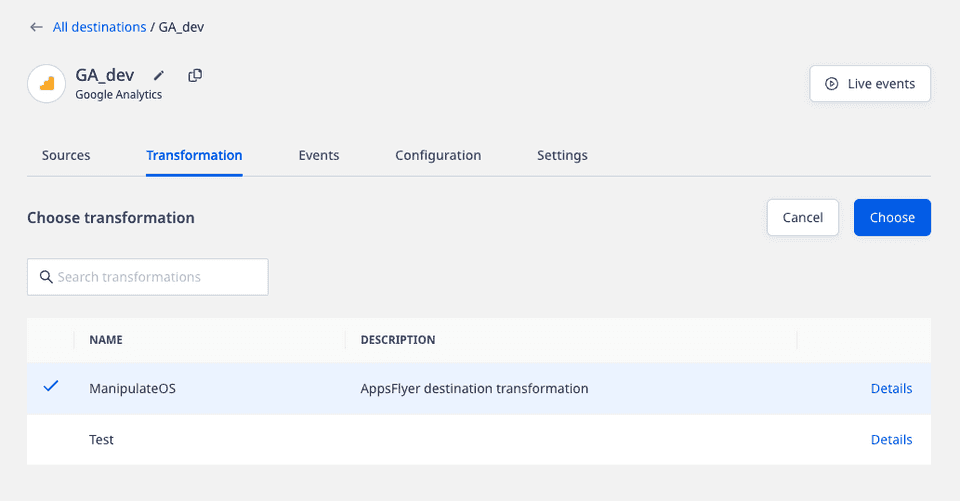
- Then, choose the transformation to connect to the destination.
Deleting a transformation
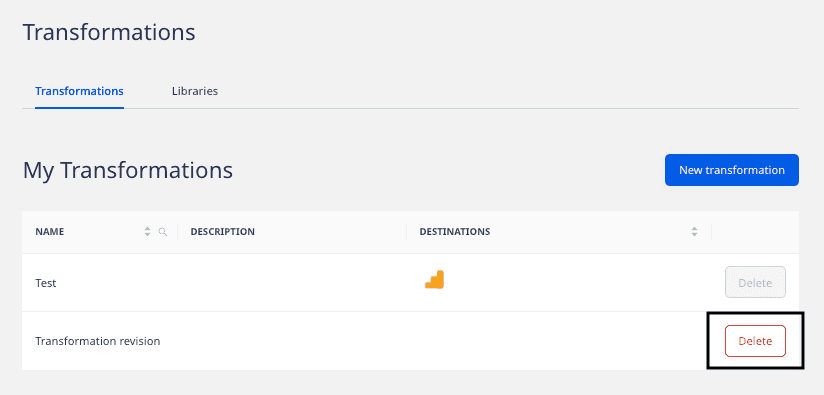
To delete a transformation, go to Enhance > Transformations and click the Delete button next to the transformation that you want to delete, as shown:
transformEvent function
While using a transformation, RudderStack applies the transformEvent function on each event that takes two arguments:
event: Corresponds to the input event.metadata(optional): Corresponds to the JavaScript function which you can use to access the metadata of the given event.
metadata, refer to the Accessing metadata section below.After the transformation is complete, transformEvent returns the final event to be sent to the destination.
Accessing event metadata
RudderStack injects a function metadata(event) into your transformations as an argument. This allows you to access the event metadata variables that help you customize your transformations.
metadata() takes the event as the input and returns the metadata of the event.The following properties, if available, are present in the metadata response:
| Property | Description |
|---|---|
sourceId | The source ID in the Settings tab of your configured source in the dashboard. |
destinationId | The destination ID in the Settings tab of your configured destination in the dashboard. |
messageId | The unique ID for each event. |
An example of using metadata is shown below:
export function transformEvent(event, metadata) { const meta = metadata(event); event.sourceId = meta.sourceId;
return event;}Making external API requests
You can make any number of external API requests in your transformation functions and use the response to enrich your events.
RudderStack injects an asynchronous fetch function in your transformations. It makes an API call to the given URL and returns the response in the JSON format.
You can use the fetch function in your transformations, as shown:
export async function transformEvent(event, metadata) { const res = await fetch("post_url", { method: "POST", // POST, PUT, DELETE, GET, etc. headers: { "Content-Type": "application/json;charset=UTF-8", Authorization: "Bearer <authorization_token>" }, body: JSON.stringify(event) }); event.response = JSON.stringify(res); return event;}fetch function in action, refer to the Clearbit enrichment sample transformation.batch API requests instead of a separate API request for each event wherever possible.Fetching response properties using fetchV2
FetchV2 is a wrapper for the fetch call. It enables you to fetch the response properties more efficiently while making the external API calls.
The following properties are present in a fetchV2 response:
| Property | Description |
|---|---|
status | Status code of fetch response, for example, 200. |
url | The URL of the Fetch API. |
headers | The response headers |
body | The response body in JSON or TEXT. By default, it is JSON. |
The below example highlights the use of the fetchV2 function in a transformation to capture failure due to a timeout:
export async function transformEvent(event) { try { const res = await fetchV2("url", { timeout: 1000}); if (res.status == 200) { event.response = JSON.stringify(res.body); } } catch (err) { log(err.message); } return event;}Contact us
For more information on the topics covered on this page, email us or start a conversation in our Slack community.