WebEngage is a full stack marketing automation tool. It lets you drive growth for your businesses by engaging your users via push and in-app notifications, email campaigns, etc. You can also leverage WebEngage's analytics capabilities to get a 360-degree view of your users and the product.
RudderStack supports WebEngage as a destination to which you can seamlessly send your event data for efficient marketing and analytics.
Getting started
Before configuring WebEngage as a destination in RudderStack, verify if the source platform is supported by WebEngage by referring to the table below:
| Connection Mode | Web | Mobile | Server |
|---|---|---|---|
| Device mode | - | - | - |
| Cloud mode | Supported | Supported | Supported |
Once you have confirmed that the source platform supports sending events to WebEngage, follow these steps:
- From your RudderStack dashboard, add a source. Then, from the list of destinations, select WebEngage.
- Assign a name to the destination and click Continue.
Connection settings
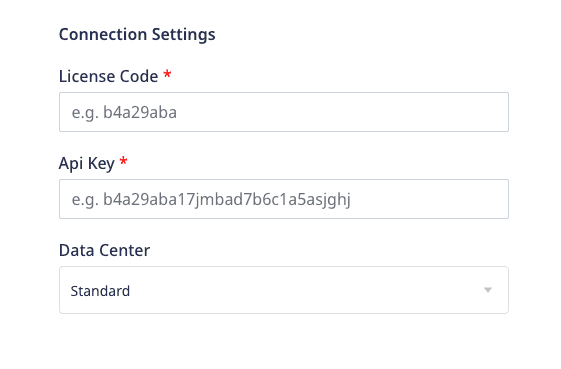
To successfully configure WebEngage as a destination, you will need to configure the following settings:

- License Code: Enter your WebEngage license code.
- API Key: Enter your WebEngage API key.
- Data Center: Select your WebEngage data center from the dropdown.
Identify
The identify method lets you identify a user and associate them to their actions. It also lets you record any traits about them like their name, email, etc.
RudderStack uses the identify call to create or update the customer information in WebEngage. It maps userId or anonymousId (userId is prioritized if both are present ) to WebEngage's userId before sending the data via the users API.
A sample identify call is shown below:
rudderanalytics.identify("1hKOmRA4GRlm", { email: "alex@example.com", phone: "+1-202-555-0146",});Traits mapping
RudderStack maps the following identify traits to the corresponding WebEngage attributes:
| RudderStack trait | WebEngage attribute | Presence | Notes |
|---|---|---|---|
userId | userId | Required if anonymousId is not present. | userId cannot exceed 100 characters. |
anonymousId | anonymousId | Required if userId is not present. | anonymousId cannot exceed 100 characters. |
firstName | firstName | Optional | The user's first name. |
lastName | lastName | Optional | The user's last name. |
birthday/dateOfBirth/dateofbirth/dob/DOB | birthDate | Optional | The user's birth date in the ISO format: yyyy-MM-dd. |
gender | gender | Optional | The user's gender. |
email | email | Optional | The user's email. |
phone | phone | Optional | The user's phone. |
emailOptIn | emailOptIn | Optional | The user's email subscription preference. |
smsOptIn | smsOptIn | Optional | The user's SMS subscription preference. |
whatsappOptIn | whatsappOptIn | Optional | The user's WhatsApp subscription preference. |
company.name | company | Optional | The user's company. |
hashedEmail | hashedEmail | Optional | The user's hashed email for email services. |
hashedPhone | hashedPhone | Optional | The user's encrypted phone number for SMS services. |
postalcode / address.postalCode | postalCode | Optional | The user's postal code. |
region / address.region | region | Optional | The user's region. |
locality / address.locality | locality | Optional | The user's locality. |
city / address.city | city | Optional | The user's city. |
country / address.country | country | Optional | The user's country. |
attributes | attributes | Optional | The user's custom attributes as key-value pairs. |
Identify traits considerations
Note the following when sending identify traits to WebEngage:
- Either
userIdoranonymousIdmust be present in theidentifycall. - If both
userIdandanonymousIdare present in theidentifycall, RudderStack ignoresanonymousId. - WebEngage prioritizes
hashedEmailoveremail. Hence, once you sethashedEmail, it can then be updated only through a newhashedEmail. - WebEngage prioritizes
hashedPhoneoverphone. Hence, once you sethashedPhone, it can then be updated only through a newhashedPhone.
Track
The track method lets you capture user events along with the properties associated with them.
RudderStack uses the track call to send the custom events to WebEngage via the events API.
A sample track call is shown below:
rudderanalytics.track("Order Completed", { timestamp: "2022-05-05T14:58:10.000Z", currency: "USD", checkout_id: "X23441", order_id: "ORD00123"});identify before track for RudderStack to include the userId in the track events. Otherwise, RudderStack will send the track calls to WebEngage with an anonymousId.Property mapping
RudderStack maps the following event properties to the corresponding WebEngage attributes:
| RudderStack trait | WebEngage attribute | Presence | Notes |
|---|---|---|---|
userId | userId | Required if anonymousId is not present. | userId cannot exceed 100 characters. |
anonymousId | anonymousId | Required if userId is not present. | anonymousId cannot exceed 100 characters. |
eventName | event | Required | The event name. |
timestamp/originalTimestamp | eventTime | Optional | The date and time of the event in ISO format: yyyy-MM-ddTHH:mm:ss±hhmm. |
properties | eventData | Optional | The custom event attributes as key-value pairs. |
Setting custom attributes
WebEngage lets you send custom attributes as key-value pairs in the eventData parameter as described in the above section. However, there are a few things you should keep in mind:
- WebEngage ignores any custom attributes starting with
we_as these are reserved for internal use. - User attribute names must be less than 50 characters, while the
stringattribute values cannot exceed 1000 characters. WebEngage automatically truncates any additional characters. - You can create a maximum of 25 custom user attributes of each data type.
- If the attribute value is a JSON object, it can only be used to personalize your campaigns. These attributes cannot be used to create user segments.
- Once defined, the data type of a custom user attribute cannot be changed again.
Page
The page call lets you record your website's page views with any additional relevant information about the viewed page.
RudderStack internally transforms the page call into a track call before sending it as a custom event to WebEngage. It sends the event/category name by transforming it in the Viewed ${category} ${name} page format.
For example, consider the following page call:
rudderanalytics.page("Home", "Clothes", { path: "/best-seller/1", referrer: "https://www.google.com/search?q=estore+bestseller", search: "estore bestseller", title: "The best sellers offered by EStore", url: "https://www.estore.com/best-seller/1"});RudderStack transforms the above event into a track call named Viewed Home Clothes page and sends it to WebEngage as a custom event.
page event properties to WebEngage, similar to the track event properties.Screen
The screen method lets you record whenever your user views their mobile screen with any additional relevant information about the screen. It is the mobile equivalent of a page call.
RudderStack internally transforms the screen call into a track call before sending it as a custom event to WebEngage. It sends the event/category name by transforming it in the Viewed ${category} ${name} screen format.
For example, consider the following screen call:
rudderClient.screen( "Games", "home", RudderProperty().putValue("foo", "bar"), null)RudderStack transforms the above event into a track call named Viewed Games home screen and sends it to WebEngage as a custom event.
screen event properties to WebEngage, similar to the track event properties.FAQ
Where can I find the WebEngage License Code and API key?
To get your WebEngage License Code and API key, follow these steps:
- Log into your WebEngage dashboard.
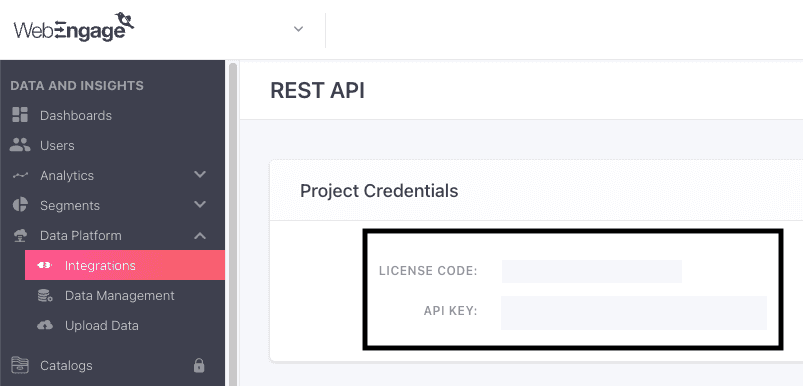
- Go to Data Platform > Integrations > REST API.
- You will find the WebEngage License Code and API Key listed under Project Credentials, as shown:

Contact us
For more information on the topics covered on this page, email us or start a conversation in our Slack community.